At Austec we are committed to making our copper press fittings easy for plumbers to install.
Our Austec Press copper system is designed for speed, ease and reliability. Our copper fittings are equipped with leak detecting o-rings and press indicators, providing extra precautions. But even with the best tools, installation errors can happen.
No plumber sets out to install copper press fittings incorrectly, but things don’t always go according to plan. Here’s a quick refresher on best practices to ensure a secure, warranty-compliant press every time.
Step 1: The Cut
Step 1: The Cut.
Start with a clean, square cut on your copper tube. Uneven cuts can cause issues down the line. We recommend using a high-quality cutter—brands like Ridgid and Rems offer great options at reasonable prices.
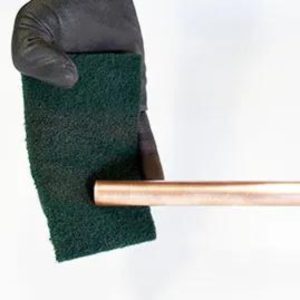
Step 2: The Debur
Step 2: The Debur.
Use a quality deburring tool inside and out to smooth the tube’s edges. Rough edges can damage the o-ring, leading to leaks. If an o-ring is compromised, the fitting is useless.
Step 3: The Clean
Step 3: The Clean
We know many plumbers skip this important step. Dirt and residue may seem harmless, but they can compromise the seal. Wipe down the tube thoroughly before fitting to protect the o-ring and ensure a secure press.
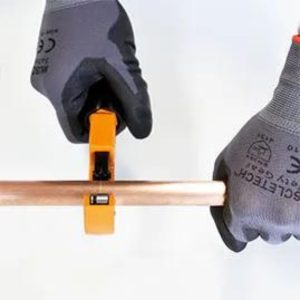
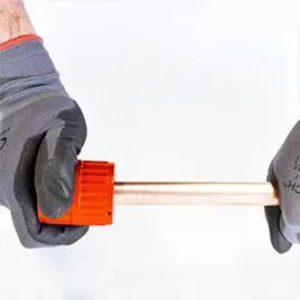
Step 4: The Witness Mark
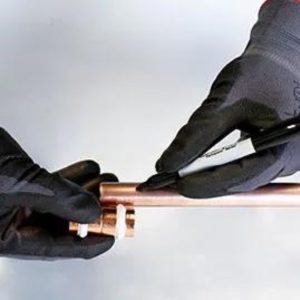
Step 4: The Witness Mark.
Mark the insertion depth on the tube using a permanent marker. You can use a depth gauge or simply slide the fitting onto the tube and mark where it stops.
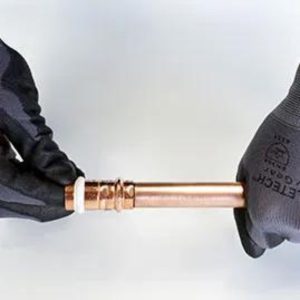
Step 5: The Fit
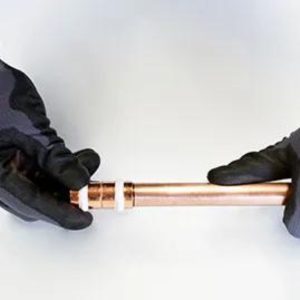
Step 5: The Fit.
Slide your fitting onto your tube until it can go no further. It should fit smoothly. Resistance may indicate tube warping or damage to the o-ring.
Step 6: The Press
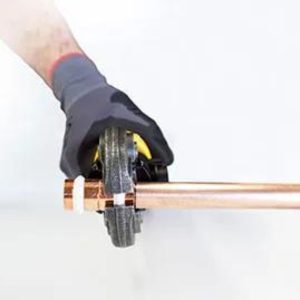
Step 6: The Press.
Select the correct sized copper jaws, open them, and position the groves of the jaws around the o-ring section. Ensure there is no movement before engaging a full press cycle with your press tool.
Step 7: The Check
Step 7: The Check.
Remove the jaws and inspect the fitting. Use a little lube if your fitting sticks to the jaws. Check that your fitting aligns with your witness mark and that the press indicator has come off. For added quality control, initial the tube to track who performed the press – and so that everyone can see who maintains the best press practices in your business!
These steps may seem simple. But for a proper seal, and to maintain warranty, you must follow them meticulously. For expert advice, call 02 9604 2774 or click here to send us your questions.